Showing posts with label DIY Decorating. Show all posts

10.21.2010

Building a Bed with Storage

I am reposting this entry because Charlentrèe will no longer feature "Things" as a separate page. 

     
     Although I assisted in the building of the bed, it was really my husband’s brain child. We live in a teeny tiny house and we have a teeny tiny guest room. We love having extra space for company but it often ends up being our catchall storage room. My husband had the brilliant idea to build a bed that would provide extra storage and free up space for guests and a desk (this room also triples as my office space). I am posting the pictures, but there won’t be any detailed instructions because I don’t really know how he did it! If you would like detailed instructions please leave a comment including your email address and I will get him to send them to you. I hope you enjoy nonetheless! 
Purchasing materials

The blueprint.

Cutting wood.

Building storage compartments.

View from the foot of the bed, space inside for storage.

Side view.


Almost finished product, still to be painted.


10.08.2010

Hosting a Fall Cookout


     The first weekend of October Andrew and I hosted a small cookout for a few close friends. Andrew grilled hamburgers, I made some sides and did the decorating, and our friends brought something yummy to share as well. Below, I have posted some pictures to inspire you to get into the fall season! Everything was very simple and affordable - like dollar store affordable. As you prepare for your own gatherings, remember it’s all about making your company feel welcomed, taken care of, and relaxed! Enjoy!

Straight glass vases filled with candy corn,  votives, and tied with a ribbon for the buffet table.

Glass pumpkin filled with candy corn and green apples for the buffet table.

Small vases filled with candy corn, votives, and tied with ribbon for the dining tables.


Buffet table centerpiece


Dining tables' centerpieces


Yellow table cloth with packing paper runner


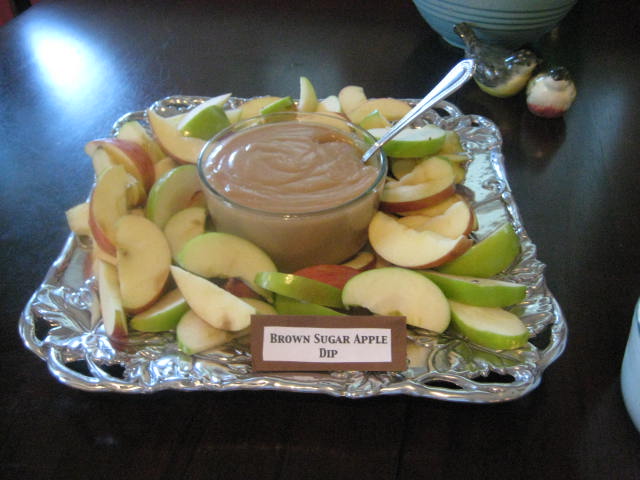
I like to make labels for the food so that guests know what they are eating


Potted mums and pumpkins always make things feel like fall. 


9.11.2010

Making an Autumn Wreath

     Fall is upon us! While I do not feel it in the air yet (September 10th and 95 degrees) I feel it in conversations and the onset of fall activities like school and football season starting. Honestly, I have never been a big fan of fall because I love summer more than life and fall means summer is over. However, this year I have decided to try to change my tune and one way of doing that is to DECORATE! For me, having my home reflect the season or approaching holiday creates a sense of excitement and anticipation. A wreath on the front door can be the first taste of a beautifully seasonal home. As a young woman on a budget I could not afford any of the beautiful wreaths I saw for sale, so I decided to make my own. I’ll show you how step by step!


1. I bought a simple vine wreath for $5 from a local craft store.


2. I chose the wreath inserts from the same craft store for about a dollar each. I really wanted gourds and apples and did not want my wreath to be too orangey. I laid them out until I found a pattern I liked. For my wreath, I have 6 larger inserts, each with a gourd or an apple, and two fillers made of berries in between each large piece. Totaling 6 large pieces and 12 fillers.


3. Next, I wove the stems of the large pieces into the body of the wreath and secured them using floral wire. Note: do not trim the excess stems. 


4. After all the large pieces were in place, I repeated the process with the fillers. I was not able to cut the stems so I tucked them into the body of the wreath. This worked well because you cannot see them and it gives the inserts more stability. I then hung the wreath on my front door and voila! Fall is here! 
Please don't mind the half painted door. Some projects come before others!